Rigging a heavy industrial press is a complex, safety‑critical operation that requires meticulous planning, precise execution, and rigorous follow‑through. Whether you’re relocating a hydraulic stamping press, installing a mechanical forging press, or commissioning a new assembly‑line punch press, every phase—from initial site assessment to final commissioning—must be handled with professionalism and technical rigor. Mistakes can lead to equipment damage, production delays, or serious safety incidents.
In this guide, we’ll break the process into four major sections: Planning & Preparation, Rigging Equipment & Hardware, Rigging Execution, and Commissioning & Handover. Each section contains detailed sub‑sections covering best practices, OSHA/ISO safety considerations, and practical tips honed from decades of industry experience. Plus, you’ll find a concise integration of why Alltracon is the go‑to partner for heavy press rigging, ensuring your project succeeds on time, within budget, and—most importantly—with zero safety incidents.
Planning & Preparation
Before any physical work begins, rigorous planning and preparation form the foundation of a safe, efficient rigging operation.
Site Assessment & Layout
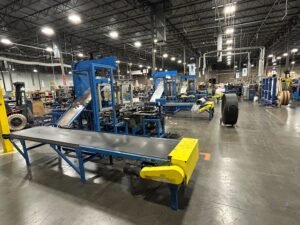
A thorough site assessment verifies that your facility can accommodate the press’s footprint, load requirements, and service access needs. Begin by surveying the installation area for floor flatness and load‑bearing capacity. Most heavy presses exert concentrated loads; confirm the concrete pad or steel support meets or exceeds the press’s specified static and dynamic loads. Also evaluate ambient environmental factors—temperature, humidity, exposure to corrosive agents—and ensure there’s adequate ventilation and lighting.
Next, map out material handling routes. Sketch an as‑built layout showing overhead crane rails or gantry crane locations, forklift aisles, and pedestrian traffic patterns. Validate clearance envelopes for the press’s moving components, ensuring no obstructions when the ram cycles or doors open. Finally, coordinate with maintenance and safety teams to establish exclusion zones and emergency egress pathways.
Technical Documentation & Machine Data
Rigging plans hinge on accurate machine data. Obtain and review the press’s OEM documentation, including weight, center‑of‑gravity drawings, lift‑point coordinates, and hydraulic/electrical schematics. Pay special attention to any stabilizing outriggers or subframe assemblies that may alter the load path. If the press is being retrofitted or decommissioned for relocation, measure its current dimensions and inspect lift points for damage or deformation.
Compile a rigging dossier that includes the manufacturer’s manual, vendor lift‑plan recommendations, and detailed drawings annotated with certified lift‑point labels. This dossier becomes the definitive reference for riggers, crane operators, and project managers, minimizing ambiguity and enhancing accountability.
Regulatory Compliance & Permitting
Heavy press rigging often triggers local permitting requirements, especially when using oversized cranes or blocking aisles in a production facility. Contact your municipality or county building department to secure necessary crane permits, sidewalk closures, or street‑use authorizations. Internally, ensure your rigging procedures comply with OSHA 1910.179 (overhead cranes) and ANSI/ASME B30.2 (overhead hoists) standards, as well as any ISO 12100 risk‑assessment guidelines.
Additionally, alert your insurer and provide a copy of the rigging plan, including load calculations and safety protocols. Many carriers require pre‑job documentation to maintain full policy coverage. If you’re working within union‑represented facilities, secure labor jurisdiction approvals and verify that your riggers and crane operators hold current certifications.
Project Timeline & Coordination
Develop a comprehensive timeline that sequences every activity: site prep, equipment arrival, crane setup, mechanical rigging, electrical hookups, commissioning, and final walkthrough. Build in contingency buffers—at least 10% of total project duration—to absorb unforeseen delays such as weather‑related crane postponements or last‑minute site modifications.
Regularly convene cross‑functional progress meetings with stakeholders: production supervisors, maintenance leads, safety officers, and third‑party inspectors. Distribute detailed meeting minutes that call out open action items, responsible parties, and deadlines. Transparent communication ensures each department understands its role, reduces surprises, and fosters a collaborative environment that keeps the project on schedule.
Rigging Equipment & Hardware
With groundwork laid, the next vital phase is selecting, inspecting, and preparing the rigging hardware that will bear the full weight of the press.
Rigging Hardware Selection
Heavy presses demand high‑capacity hardware: chain slings rated for working load limits (WLL) well above the press weight, alloy steel shackles marked with grade and capacity stamps, and spreader bars or lifting frames to distribute load points safely. When choosing hardware:
-
Match WLL to Maximum Load: Select slings and shackles with at least a 25% safety margin above the press’s gross weight.
-
Consider Sling Angle: Account for the reduction in lift capacity at sling angles less than 90 degrees; consult manufacturer charts to avoid exceeding stress ratings.
-
Use Spreader Beams When Necessary: For presses with wide lift‑point spacing or sensitive cast‑iron frames, spreader beams reduce point loads and prevent chassis deformation.
Pre‑Use Inspection & Certification
Prior to deployment, every piece of rigging hardware must undergo a documented inspection. Visually check for nicks, gouges, corrosion, or elongation of chain links. Measure sling wear per industry guidelines and retire any hardware beyond manufacturer’s wear limits. Verify that all shackles bear legible markings indicating size, grade, and WLL.
Maintain a Rigging Log that records inspection dates, inspector names, and unique ID tags for each sling, shackle, and beam. This log serves both safety‑audit requirements and internal quality control, ensuring no questionable hardware makes it onto the job.
Rigging Plan Development
Armed with accurate machine data and certified hardware, draft a detailed rigging plan diagram. This schematic shows crane positioning, boom angles, sling configurations, spreader bar attachments, and cradle support points. Annotate the plan with load calculations at each connection and note any special procedures—such as the sequential release of pressure on hydraulic leveling jacks to prevent sudden load shifts.
Circulate this plan to crane operators, riggers, and safety inspectors for approval. Any modifications—like relocating lift points due to on‑site obstructions—should trigger an updated load analysis to confirm safety margins remain intact.
Rigging Execution
This section covers the physical execution of the rigging operation: setting up cranes, controlling lifts, and managing on‑site safety.
Crane Setup & Calibration
Position your crane on firm, level ground, reinforced as needed with crane mats or steel plates. Confirm outrigger stability with inclinometer readings and load‑chart references at the chosen boom length and angle. Before attaching the slings, perform a “no‑load” swing test to verify crane controls, boom articulation, and slew‑ring functionality.
Never rely on the crane’s dynamic load indicator (DLI) alone; cross‑check with manual load‑chart calculations. Gale‑force winds or uneven ground can skew safety margins, so adhere strictly to the manufacturer’s wind‑speed limits for lifts.
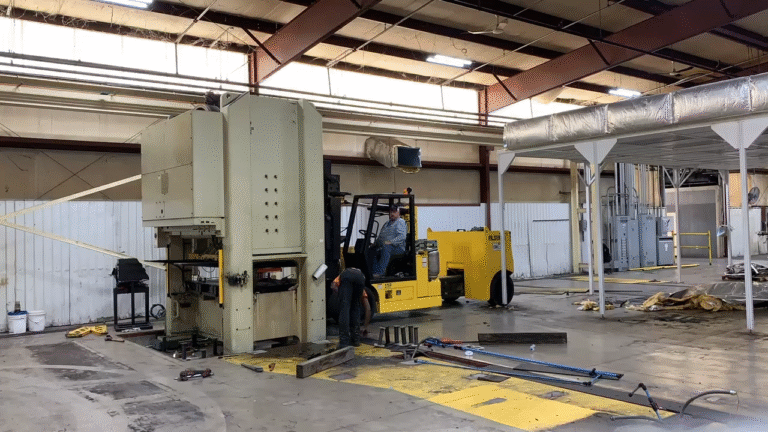
Sling Attachment & Load Control
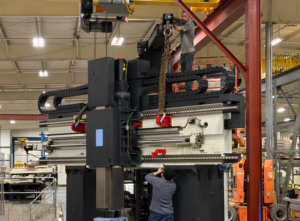
With the press stably blocked and support jacks in place, attach slings to predetermined lift points. Use softeners or protective sleeves to shield painted surfaces and cast‑iron edges. Before lifting, tag line each sling end to prevent slippage and ensure clear communication: assign a single rigger to manage the tag line for each leg.
As the crane slowly takes up slack, conduct a pilot lift just enough to unweight the press. Check for unexpected shifts or binding. If the press tilts, immediately lower it back onto blocking and reassess sling angles, load distribution, and framing stiffness. Only when the press lifts level—within 1–2 degrees—proceed to full hoist.
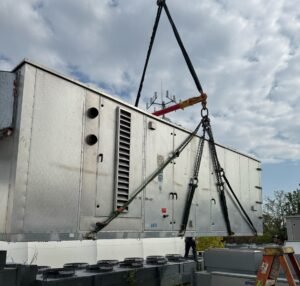
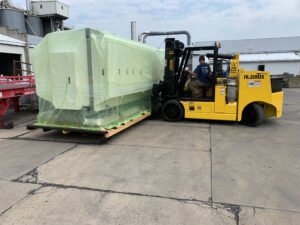
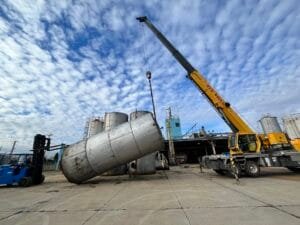
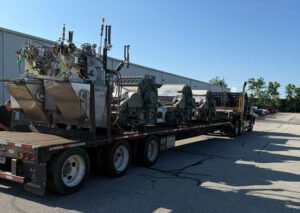
Coordinated Lift & Transport
With the press clear of blocking, travel motions must be deliberate and coordinated. The crane operator and the site’s signalperson communicate via radio or standardized hand signals. Maintain minimal crane swing and slewing motions; avoid sudden starts or stops that can induce load sway. If a forklift or gantry system is used for final positioning, synchronize movements so that neither system bears more than its share of the load at any time.
During transport, continually monitor load angles and tag‑line tension. Halt the move if tag lines over‑pull, indicating an obstruction or ground shift. Never leave a suspended press unattended, even briefly.
Controlled Lowering & Placement
As you near the final position, slow the crane’s descent and align the press with its foundation bolts or anchor points. Spotters at each corner guide the frame into grout‑filled pockets or mounting pads. For presses requiring perfect leveling, use integrated leveling jacks or shim packs to achieve manufacturer’s tolerances—often within 0.2 mm over the base footprint.
Once settled, re‑install anchor bolts or torque plates per OEM specifications. Grout under base plates using non‑shrink, high‑strength grout. After the grout has cured (usually 24–72 hours), re‑verify alignment and adjust if necessary.
On‑Site Safety Management
Throughout the execution phase, a dedicated Safety Officer should manage exclusion zones, LOTO procedures, and emergency response readiness. Equip all personnel with hard hats, steel‑toe boots, high‑visibility vests, and hearing protection as specified. Conduct regular safety briefings—before each major lift—and verify that communication channels (radios, whistle signals) are working.
Commissioning & Handover
Rigging doesn’t end when the press touches down. Full commissioning and client handover cement the project’s success.
Mechanical & Hydraulic Commissioning
Begin commissioning by cycling the press empty, verifying hydraulic pressures, flow rates, and valve sequencing against OEM curves. Watch for leaks, abnormal noises, or pressure drops. Use calibrated gauges and an inline particulate monitor to ensure hydraulic fluid cleanliness.
Next, conduct a slow‑speed mechanical run—operating the press ram without load—to check slide parallelism, bed‑to‑ram clearances, and die cushion movements. Incrementally increase speed and stroke length, monitoring motor current draw and vibration signatures for anomalies.
Electrical & Control Systems Validation
With mechanical commissioning complete, power up control panels and validate electrical interlocks, safety circuit continuity, and PLC logic sequences. Test emergency‑stop circuits, light curtains, and door interlocks. Verify that all warning lights, horn signals, and operator interface screens render correct status messages.
Simulate fault conditions—such as low hydraulic pressure or over‑travel inhibit—to ensure the press safely transitions to a fault state and requires an intentional reset. Log all results in a Commissioning Report.
Operator Training & Documentation
A well‑trained operator is as crucial as a correctly aligned press. Provide hands‑on instruction covering start‑up, shutdown, fault diagnosis, daily lubrication schedules, and basic troubleshooting. Demonstrate LOTO procedures for routine maintenance and clarify spare‑parts reorder points.
Supply the client with a comprehensive O&M manual package: updated as‑built drawings, electrical schematics, hydraulic diagrams, maintenance logs, and the commissioning report. Store these in both printed binders and an organized digital repository for easy reference.
Final Acceptance & Warranty Activation
Invite the client’s maintenance and safety teams for a final walkthrough. Review each commissioning test, address questions, and obtain formal sign‑off on a Punch‑List Completion Form. Discuss warranty activation milestones and recommended service intervals. Upon acceptance, transfer all warranty documentation and share contact information for emergency support.
Alltracon: Best Service Provider
Throughout every phase—from site surveys and load‑calculation reviews to crane‑setup, precision alignment, and full-scale commissioning—Alltracon’s certified rigging teams deliver turnkey solutions that minimize downtime, eliminate safety risks, and guarantee peak press performance. Trust Alltracon to be your partner in heavy‑press rigging excellence.
Conclusion
Rigging a heavy industrial press demands a holistic approach: comprehensive planning, conscientious hardware selection, carefully choreographed execution, and meticulous commissioning. By adhering to regulatory standards, employing certified rigging professionals, and engaging in stringent testing protocols, you safeguard personnel, protect your capital equipment, and optimize production readiness. Whether you handle a single press relocation or a factory‑wide equipment modernization, the strategies outlined here will serve as your blueprint for safe, efficient, and reliable press installations—backed by Alltracon’s proven expertise in heavy‑equipment moves.