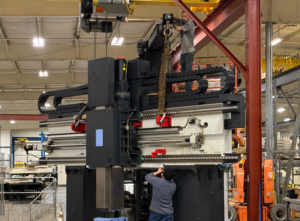
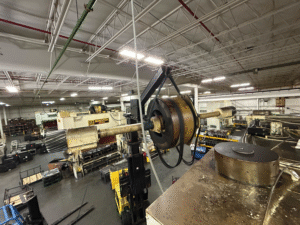
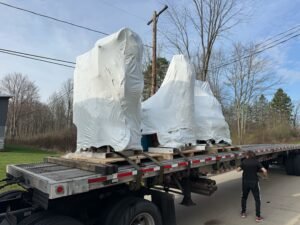
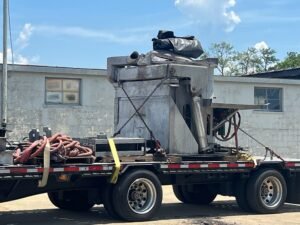
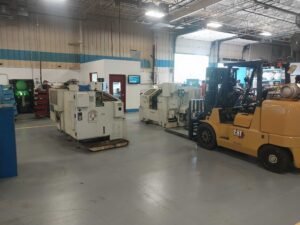
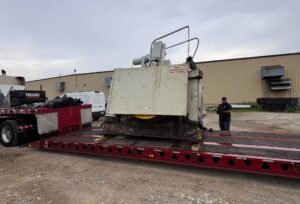
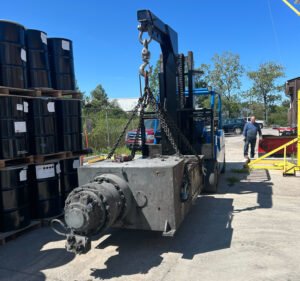
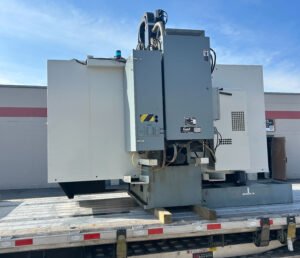
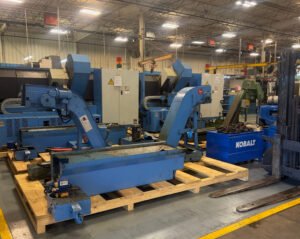
The truck is gone, the machine is inside and the crew is packing up the skates. On many schedules, that is where the project ends. On the shop floor, it is where the real test begins.
A press that is not properly anchored walks across the floor. A CNC machine set on a twisted base cuts out-of-tolerance parts. A pump and motor that are slightly misaligned destroy bearings and seals within months. None of these problems come from the move itself. They come from what happened, or didn’t happen, after the move.
This guide explains why industrial equipment installation matters as much as rigging, and what a professional installation includes: foundation preparation, setting, leveling, anchoring, grouting, alignment and commissioning. Whether you are installing new equipment or reinstalling machines after a relocation, these steps determine how well your equipment performs for years.
Why Installation Quality Matters
Every machine is designed to run on a stable, level and properly supported base. When that base is wrong, the problems show up in four ways:
- Accuracy. Machine tools, measuring equipment and precision lines depend on geometry. If the base twists, so does the machine’s accuracy.
- Vibration. Poor support allows vibration to grow, which shortens bearing life, loosens fasteners and affects product quality.
- Wear. Misalignment between shafts, rolls or conveyor sections causes rapid wear of couplings, bearings, belts and chains.
- Safety. Unanchored heavy equipment can shift, tip or walk, especially presses, tall machines and equipment with heavy moving parts.
Good installation is cheaper than the repairs, scrap and downtime caused by bad installation. It is also often required by the equipment manufacturer to keep warranties valid.
Step 1: Prepare the Foundation Before the Machine Arrives
Installation starts weeks before delivery. The foundation must be designed, built and cured before any heavy machine sits on it.
Check the Manufacturer’s Requirements
Most OEMs provide a foundation drawing or installation manual that specifies:
- Minimum slab thickness and concrete strength.
- Whether a separate isolated foundation or pit is required.
- Anchor bolt locations, sizes and embedment depth.
- Leveling pad or mount locations.
- Floor flatness requirements.
- Utility locations and clearances.
Evaluate the Existing Floor
Many plant floors were built for general use, not for heavy or dynamic equipment. Before setting heavy machines, check:
- Actual slab thickness, which can be confirmed by core drilling.
- Concrete condition, including cracks, joints and old repairs.
- Whether control joints or slab edges run under the machine footprint.
- Soil conditions below the slab when loads are very heavy.
Presses, forging equipment and large machine tools often need their own engineered foundation. Our article on heavy cold forging equipment rigging best practices explains why dynamic machines need special attention.
Allow New Concrete to Cure
Concrete is commonly designed to reach its specified strength at about 28 days. Setting very heavy equipment too soon can crack new foundations or cause settlement that pulls the machine out of level. Follow the engineer’s guidance on when loads can be applied.
Lay Out the Footprint
- Establish reference lines from building columns or existing equipment.
- Mark the machine centerline, anchor locations and leveling points.
- Set an elevation benchmark for machines that must match conveyors or other equipment.
- Use anchor bolt templates for cast-in bolts.
Step 2: Set the Machine in Position
Setting is the act of placing the machine precisely on its footprint.
- Rig the machine using approved lifting points and the right equipment, such as jacks, skates, forklifts, gantries or cranes.
- Lower it onto leveling pads, jack screws or temporary supports, not directly onto the floor if leveling is needed.
- Align it to the layout lines and centerlines within the required tolerance.
- Check that service clearances, door swings and chip conveyor discharge points are correct.
For lines of equipment, such as conveyors or processing lines, set the anchor machine first and position the others from it. Our conveyor system and plant install project shows how this works on a full line.
Step 3: Level the Equipment
Leveling makes the machine’s base flat and true so that its moving parts work as designed.
Choose the Right Tools
- Precision machinist’s levels with resolutions of 0.0005 in/ft or finer for machine tools.
- Electronic levels for faster and more precise readings on large machines.
- Optical or laser levels for long equipment and lines that must match elevations.
- Straightedges and feeler gauges for checking surfaces and gaps.
Use the Right Support Hardware
- Leveling pads or mounts with adjustable screws.
- Jack screws built into the machine base.
- Wedge mounts for fine adjustment under heavy loads.
- Stainless steel shims for permanent support under bases and feet.
- Vibration isolation mounts where the OEM requires them.
Avoid improvised shims made of wood, scrap steel or stacked washers. They compress, shift and corrode over time.
Follow a Leveling Sequence
- Rough-level the machine using the main leveling points.
- Level along the length, then across the width, at the reference surfaces the OEM specifies.
- Check for twist by comparing readings at each corner or end.
- Make small adjustments in rotation to avoid creating new distortion.
- Record final readings.
Let the Machine Settle and Recheck
Heavy machines settle into their pads and floors. Recheck level after 24 to 72 hours, and again after several weeks, especially on new concrete or after a relocation. Many manufacturers recommend periodic leveling checks as part of routine maintenance.
Step 4: Anchor the Equipment
Not every machine needs anchors, but many do. Anchoring keeps equipment from moving, walking, tipping or vibrating out of position.
When Anchoring Is Needed
- Presses, punch presses and forging equipment.
- Machines with heavy reciprocating or rotating parts.
- Tall or top-heavy equipment that could tip.
- Equipment in seismic zones or under code requirements.
- Racking, mezzanines and structures.
- When the OEM installation manual requires it.
Types of Anchors
| Anchor type | How it works | Typical use |
|---|---|---|
| Cast-in-place bolts | Set in concrete when poured | New foundations for heavy or dynamic machines |
| Wedge or expansion anchors | Expand in a drilled hole | Moderate loads in existing concrete |
| Adhesive or epoxy anchors | Bonded into a drilled hole | Higher loads, closer edge distances, retrofits |
| Undercut anchors | Mechanically lock in an undercut hole | High loads and vibration |
| Isolation mounts with anchors | Combine anchoring and vibration control | Sensitive or vibrating machines |
Anchoring Best Practices
- Use the anchor type, size and embedment specified by the OEM or engineer.
- Locate rebar and embedded conduit before drilling. Scanning the slab prevents cutting rebar or live lines.
- Respect minimum edge distances and spacing between anchors.
- Clean holes completely before installing adhesive anchors.
- Allow adhesives to cure before loading.
- Torque anchors to specification after leveling, then recheck level, because tightening can pull a machine out of level.
Step 5: Grout Where Required
Grout fills the space between a machine base and its foundation so that the load is spread evenly. It is common under presses, compressors, pumps, motors, turbines and large machine bases.
Cement-Based vs. Epoxy Grout
- Cement-based grouts are economical and suitable for many static loads.
- Epoxy grouts offer higher strength, better chemical resistance and better performance under vibration and impact.
Grouting Steps
- Level and align the machine on its leveling screws or shims.
- Clean and prepare the concrete surface.
- Build forms around the base.
- Mix and pour grout without trapping air.
- Cure according to the manufacturer’s instructions.
- Back off temporary leveling screws if specified, so the grout carries the load.
- Torque anchors after the grout cures.
Step 6: Align the Equipment
Alignment is the process of bringing related components into correct position relative to each other.
Shaft Alignment
Pumps, fans, compressors, gearboxes and motors joined by couplings must have their shafts aligned. Laser alignment tools measure offset and angular misalignment far more precisely than straightedges. Even small errors cause vibration, heat and early bearing and seal failure.
Machine-to-Machine and Line Alignment
Conveyors, rolling lines, presses with automation and processing lines need each section aligned to the line’s centerline and elevation. Laser trackers, optical tooling and piano wire methods are used depending on length and precision.
Soft Foot Checks
A soft foot occurs when one foot of a machine does not sit firmly on its base. Tightening it bends the frame. Millwrights check for soft foot with feeler gauges or dial indicators and correct it with shims before final alignment.
Step 7: Reconnect and Commission
Once the machine is set, level, anchored and aligned, it is ready for reconnection and commissioning.
Reconnect Utilities
- Power, using a licensed electrician.
- Compressed air, coolant, hydraulic oil, water and gas.
- Network and controls.
- Guards and safety interlocks.
Commission the Equipment
- Lubricate according to the OEM’s schedule.
- Check rotation direction before running motors under load.
- Run at low speed, then increase gradually.
- Check temperatures, vibration, noise and leaks.
- Test emergency stops, light curtains and interlocks.
- Run test parts and verify quality.
- Record vibration and alignment readings as a baseline for maintenance.
Our guide to plant startup and commissioning after relocation covers how commissioning fits into a larger plant restart.
Common Installation Mistakes
- Setting machines on uncured or undersized foundations.
- Skipping the second leveling check after the machine has settled.
- Using improvised shims that compress or shift.
- Tightening anchors without rechecking level.
- Ignoring soft foot before alignment.
- Starting motors without checking rotation.
- Failing to document final level, alignment and vibration readings.
- Treating installation as an afterthought to the rigging job.
Industrial Equipment Installation Checklist
| Stage | Key tasks |
|---|---|
| Before delivery | OEM foundation drawing, floor evaluation, cure time, layout and anchor templates |
| Setting | Rig with approved points, place on pads, align to centerlines |
| Leveling | Precision levels, proper mounts and shims, sequence, record readings |
| Anchoring | Correct anchor type, scan for rebar, edge distance, torque and recheck level |
| Grouting | Prepare surface, form, pour, cure, final torque |
| Alignment | Soft foot check, laser shaft alignment, line alignment |
| Commissioning | Utilities, lubrication, rotation, test run, safety checks, baseline data |
| Follow-up | Recheck level and alignment after settling |
Who Should Install Industrial Equipment?
Installation is the work of skilled millwrights. Millwrights understand foundations, rigging, leveling, alignment and mechanical assembly. They work with electricians, pipefitters and OEM technicians to bring equipment into production.
When the same company moves and installs equipment, there is no gap between the riggers who set the machine down and the millwrights who make it run. Learn more about rigging and millwright services for manufacturing facilities, and how professional millwright services improve operations.
Some installations also need custom bases, platforms, guards or supports. In-house industrial fabrication can build those parts without adding another vendor.
Installation Tips by Equipment Type
The principles are the same for every machine, but each type of equipment has its own priorities.
CNC Machine Tools
Accuracy depends on a level, untwisted base. Use precision levels at the reference surfaces the OEM specifies, recheck after settling and run a ballbar or geometry test before production. Read more about moving CNC mills and lathes and why trained riggers matter.
Presses and Forging Equipment
Presses create high dynamic loads and vibration. They usually need engineered foundations, anchors and grout, and sometimes isolation mounts or pits. Check parallelism between the bed and slide after installation, and recheck anchor torque after the first weeks of production.
Injection Molding Machines
Long machine bases must be level along their full length so the clamp and injection units stay aligned. Leveling pads or isolation mounts are common. Confirm cooling water, hydraulic and electrical connections are complete before startup.
Pumps, Compressors and Fans
These machines depend on precise shaft alignment and a rigid base. Correct soft foot, use laser alignment, grout bases where specified and record vibration readings at startup.
Conveyors and Production Lines
Set a reference centerline and elevation for the whole line. Install the anchor machine first, then align each section to it. Check belt tracking and transfer points between sections.
Documenting the Installation
The numbers recorded during installation become valuable maintenance tools. A complete installation record includes:
- Foundation details, anchor types and torque values.
- Final level readings at each measurement point.
- Shim locations and thicknesses.
- Alignment readings for each coupled shaft.
- Startup vibration and temperature readings.
- Dates of follow-up leveling and alignment checks.
- OEM sign-off or commissioning reports.
When a machine starts producing scrap or vibrating months later, these records show whether the base has shifted and save hours of troubleshooting. They are also useful for warranty claims and future relocations.
How Long Does Professional Installation Take?
Installation time depends on the machine and the site. A machine tool on pads might be set and leveled in a day, with a follow-up check a few days later. A large press with an engineered foundation, anchors and epoxy grout may take a week or more once grout cure time is included. Full production lines can take several weeks. Planning installation time into the project schedule, rather than treating it as a quick finish, prevents costly shortcuts.
Why Alltracon Is the Best Choice for Equipment Installation
Alltracon’s millwrights and riggers handle the full job, not just the move. We set, level, anchor, grout and align equipment to manufacturer specifications, then support startup and commissioning. With in-house fabrication, 24/7 support and a safety-first culture, manufacturers rely on us to deliver equipment that runs right from day one.
Frequently Asked Questions
How level does industrial equipment need to be?
It depends on the machine. Machine tools often require readings within 0.0005 in/ft or finer, while general equipment may allow more variation. Always follow the OEM’s specification.
Do all machines need to be anchored?
No. Many machine tools rest on leveling pads without anchors. Presses, vibrating equipment, tall machines and equipment in seismic zones usually need anchoring. Check the OEM manual and local codes.
What is the difference between leveling and alignment?
Leveling makes a machine’s base flat and true relative to gravity. Alignment brings related parts, such as shafts or line sections, into the correct position relative to each other.
When should epoxy grout be used?
Epoxy grout is preferred for heavy dynamic loads, vibration, impact and chemical exposure, such as under compressors, pumps and presses.
How soon can equipment be set on new concrete?
Concrete is commonly designed to reach specified strength at about 28 days. Follow the engineer’s guidance before setting heavy equipment on new foundations.
Finish the Job the Right Way
A successful move ends with equipment that is set, level, anchored, aligned and producing good parts. Treat installation as a planned phase with skilled people and the right tools, and your machines will repay the effort with accuracy, reliability and long service life.
Explore our industrial machine assembly and installation services, learn about our industrial services and millwrighting, or request a free quote today.